
I am writing this in the time of the Corona-19 pandemic. Many of my students are seriously thinking of making a personal space for marbling (rather than relying on the MN Center for Book Arts facility that is now closed). I put together notes about what to buy and think about for them and have decided that it is a good thing to publish with these notes. Of course these are not the only materials that will work to build a marbling studio, but this is how I was taught and what has worked for me.
One of my students who has already set up a marbling space suggests that people start small (vat-wise). I think that is a great idea. It gives you time to experiment with how you set up and what works in your situation. You can use the paper for cards or origami projects.
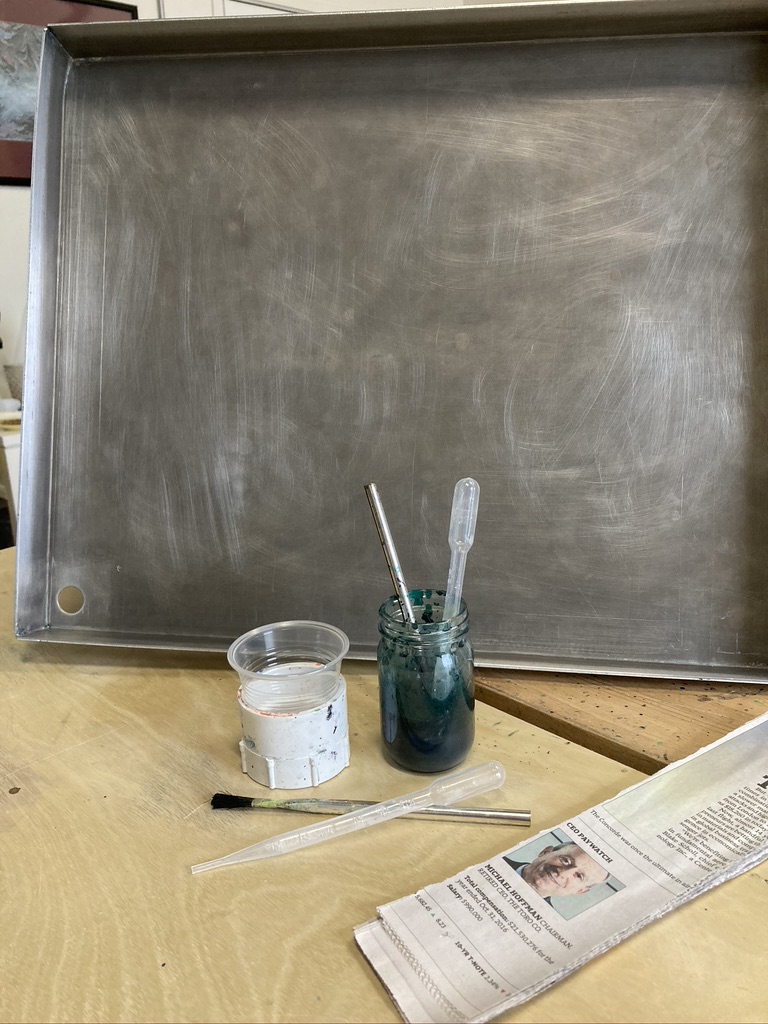
You can get a small “vat” very cheaply. Look at cookie sheets or foil pans at the grocery store. What you are looking for is relatively perpendicular sides so that the combs will work to the edges and a depth of about 1 inch. You may be able to do it with less depth, but I’m not sure. Marbling is a surface art so you could give it a try
I have a Twin Cities source for vats when you are ready to try something bigger. These vats are plexiglass and can be made to the size of your choice. The source is Cal Linzmeyer at Triple C Technologies, Inc. at 344 Taft St. N.E., Minneapolis, MN. Cal normally does Custom Display Fixtures so to dial him in to what you are looking for mention my name. Just before the first covid lock down he did a group order for us of large tanks (19 x 25) and small tanks (the small were the size of our teaching tanks – 16 x 20) — all in 1/4 inch plexiglass.
What I think “marks” a vat as a marbling vat is that they have a hole in one corner. When you start a marbling session you tape the hole (clear packing tape works for that). I actually use tape on both the inside and outside and criss-cross the tape over the hole from both sides as well. Probably overkill but I hate it when the vat leaks. Another tip is to make yourself a tab by folding one edge of the tape back on itself; that makes getting the tape off much easier. Finally I tape over the edges at the top of the vat, down onto the outside of the edge. so I don’t have as much trouble with the combs getting stuck on the tape. I have also been known to tape the tape ends down!
Measure how much your vat will hold. I would measure in cups of water. A gallon = 16 cups and you mix 2 T of carrageenan per gallon of water. That will tell you how much carrageenan to mix. While I now have a blender that is dedicated tomixing carrageenan, when I started mixing at home I used a hand held mixer that I used regularly in my kitchen. Just make sure that the mixer and blades has been well rinsed after you washed them in soap. REMEMBER, soap is not the marbler’s friend so just really rinse whatever you use carefully to get all the residual soap off! Also remember that you probably want to mix your carrageenan at least 12 hours before you marble. That is so that the bubbles are mostly out of the mixture. The carrageenan is somewhat hard to dissolve so sprinkle a little on top of the water and then use the mixer and then sprinkle more.
If you mix 1 gallon but the vat will only take about 1/2 gallon, save the rest in the refrigerator or freezer. That will make it last much longer. You know when it goes bad because it smells like fish. If you freeze it plan that it will take quite a while to thaw and you want it about the same temperature as the rest of your equipment and paint when you use it.
Carrageenan and alum — I use Galen Berry as a supplier of carrageenan (www.marbleart.us) – good quality, good price and fast – you have to call during certain hours listed on the website – 1/2 lb is currently about $25 and 1 lb is about $50 for carrageenan. Alum is about $5.
Recipes: 2 T of carrageenan per gallon water – 1/2 teaspoon of alum per cup of water
For an alum applier you can use a sponge, a microfiber car wash sponge, or a wool pad painter (Wooster).
A sheet/plank of some sort for transporting the paper to rinse after you get it off the tank and maybe too dry. Currently I use a plastic corrugated sheet that you often see used for lawn signs that you can buy at a Home Depot type store. I think it helps to tape the ends of the sheet with duck tape so that water doesn’t get into the sheet and drip everywhere.
A drying rack – I have used wooden clothes drying racks or you can buy bungee cords with butterfly clips (look for “packable clothes line” if that would work better for you). You are probably going to want some towels underneath and maybe a plastic barrier (trash bags taped together) under them so that drips don’t get on your floor/rug. This is where a wallpaper tray (see note below) or a dish rack can come in handy to let the sheets drip there first and then move them to the drying rack.
Paint containers – you can use cups and short pva pipes to keep them stable to begin (pva pipes can be found in the plumbing section) but now I use glass jars (4 oz with wide mouth) which I bought at Uline (cost with shipping about $30).
Brushes are called “glue brushes” and are inexpensive.
For droppers I now use plastic disposable transfer pipettes (not environmentally good but much easier to find than glass droppers — can be used for a couple of times if rinsed well) Glass droppers if you have a source will last for years and clean up better.
Combs: You can make your own pretty easily by using insulation foam board (at your local Home Depot like store) and plastic roller pins. I also bet that you could use wood strips (again the local Home Depot) and a normal home drill to drill holes for the plastic roller pins and then glue them in with a silicon based glue (something used on boats) so they will not fall apart in the water.
Paper: You can never tell what paper will work and what won’t because paper makers tend to add stuff to their paper that makes it hard for the alum to be absorbed. Buy a few sheets or a small pad and see how it works.
Note: While it is very helpful to have a water source close and to recognize that you will have wet sheets of paper to move around to dry, you can reduce the amount of water you need. You can do that by using a wallpaper water tray. They are long, narrow containers that are 3-4 inches deep and not very expensive. You can marble your sheet and put it there to drain and then just use a little water in a spray bottle where there is off-set of paint. Yes, you have to empty the tray fairly often but it makes working away from a water source possible. You do not have to rinse your sheets of carrageenan. We do that at MCBA because we don’t want a lot of carrageenan on the floor for people to slip on.
OK, that is a listing of the stuff that I use for marbling. I would take a day to make combs, a day to gather the other equipment needed, and some time to think about where and how you will use it all to marble. Then, you too can marble!